All StarTech.com product IDs can be identified by a combination of letters and numbers. For example, such as USB2VGAE3 or USB32VGAEH.
Typically, the product ID can be found on the unit itself, but it can also be found on the packaging it came in.
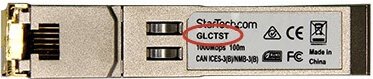
- On the product itself, it can often be found on the bottom of the unit, near either 'StarTech.com' or the serial number.
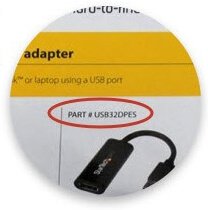
- If the product came in a box, this can often be found near the product photo after the word PART #. It may also be located above the UPC code or on the front of the packaging.